Bladerunner 2049 Fan Project
Responsible for: Planning, Editing, Compositing, Animation Retargeting, Camera, Rendering, Lighting, and Environment Layout.
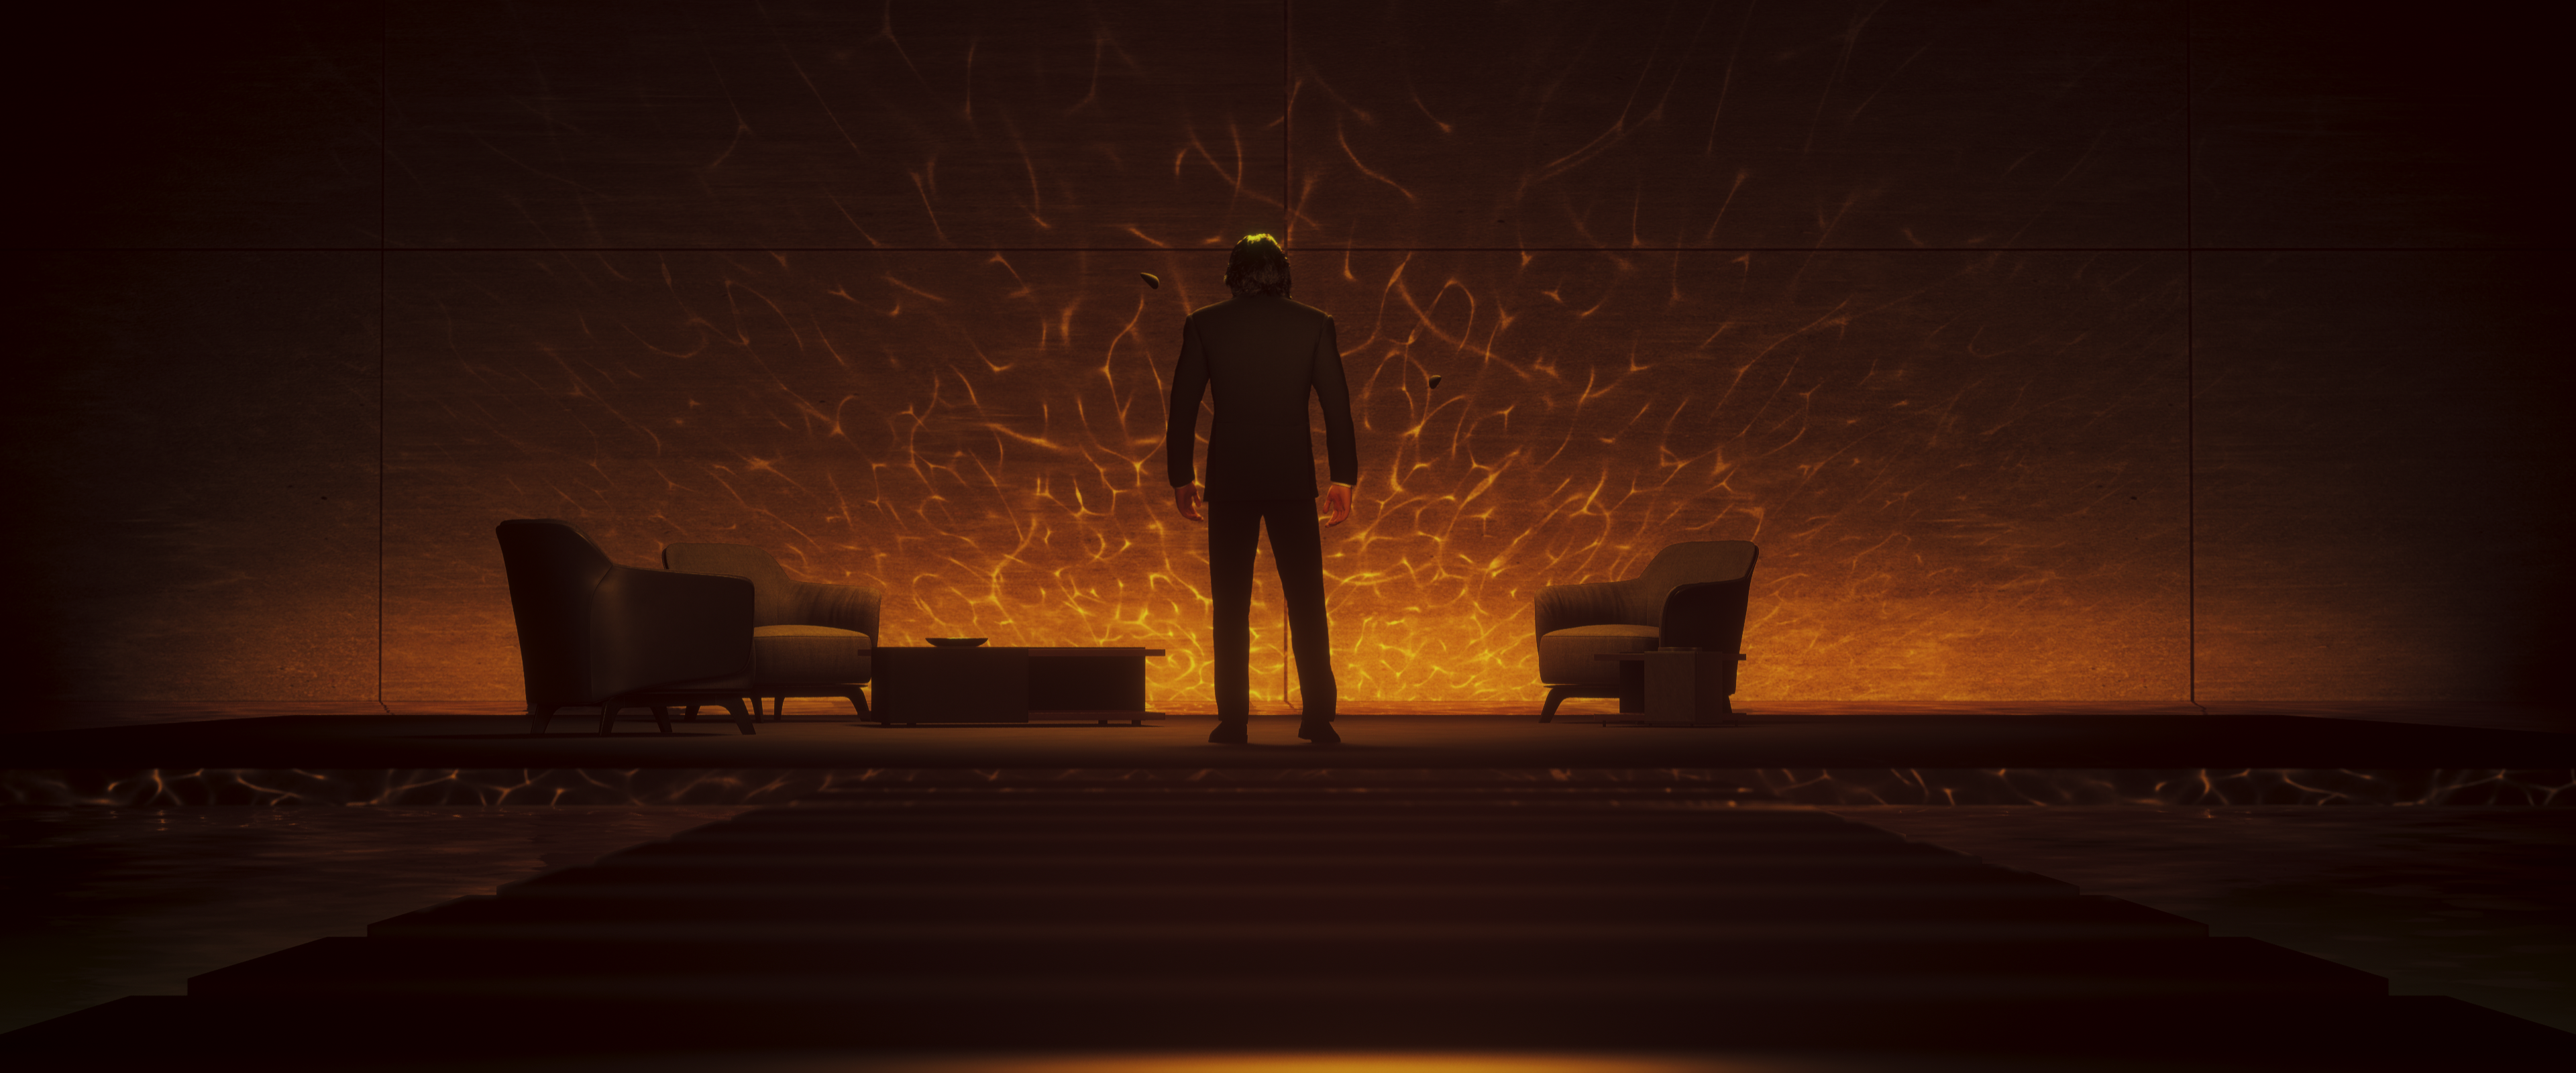
My first full Unreal Engine 5 short, more in the style of a trailer than a cinematic. I wanted to focus on scenes creating a sense of scale and distance with the large imposing buildings. All of the characters were made using Metahuman and the outfits were sourced from Sketchfab and merged with the metahuman models using Blender. These were then rigged using Actorcore Accurig.
I learnt a lot throughout this project about creating many different lighting scenarios, prepping assets for use in UE from Blender and more purposeful use of Unreal’s sequencer tools. For the lighting and environments, a lot of inspiration was drawn from Bladerunner 2049 with the heavy orange of the Las Vegas and the blues of the dystopian Los Angeles.
Some of the background buildings were made using Blender and the random flow addon.
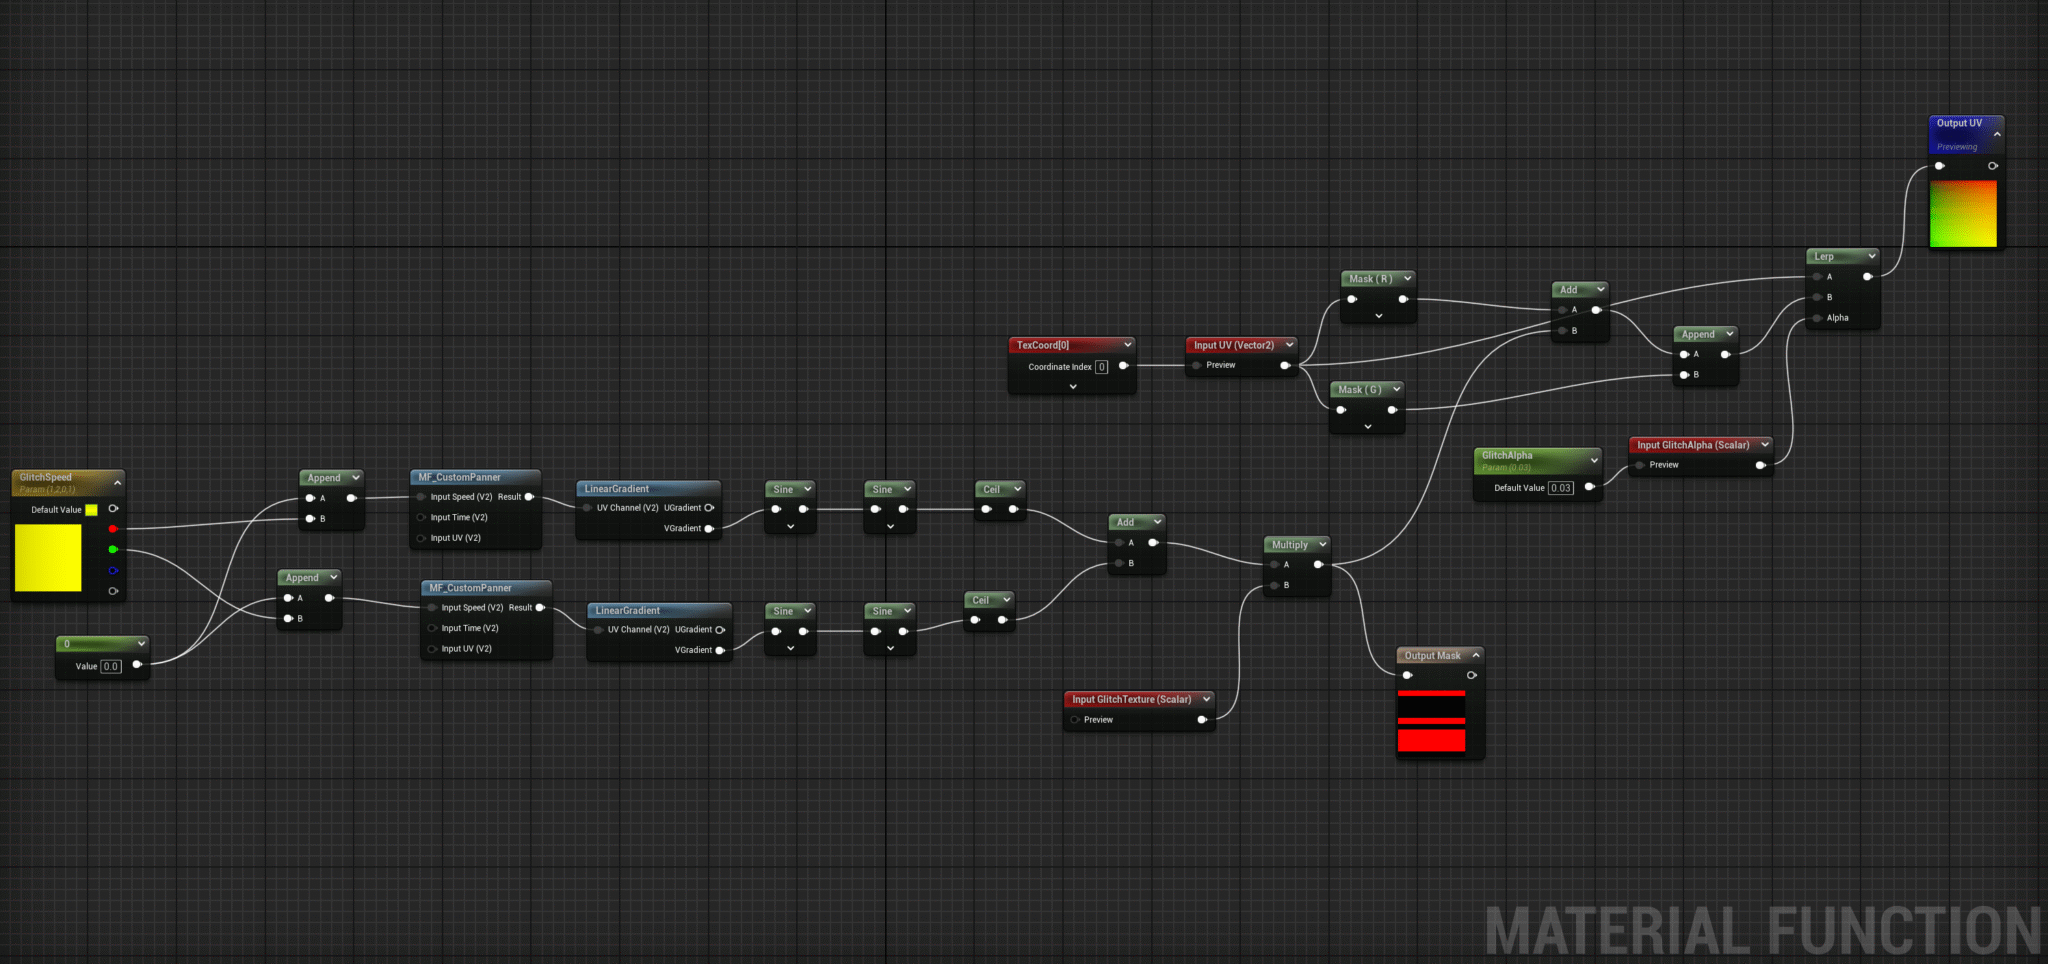
Glitch Text
The glitch text in the final sequence was made entirely in engine, I used material functions to create panning gradients which intersect each other that I found through a helpful Youtube tutorial. Combining this with an emissive master material I made allowed me to have the slight offset blue and red glitching on the text. I was also able to expose all parameters inside the material instance so I could control the gradient fade on my sequence.
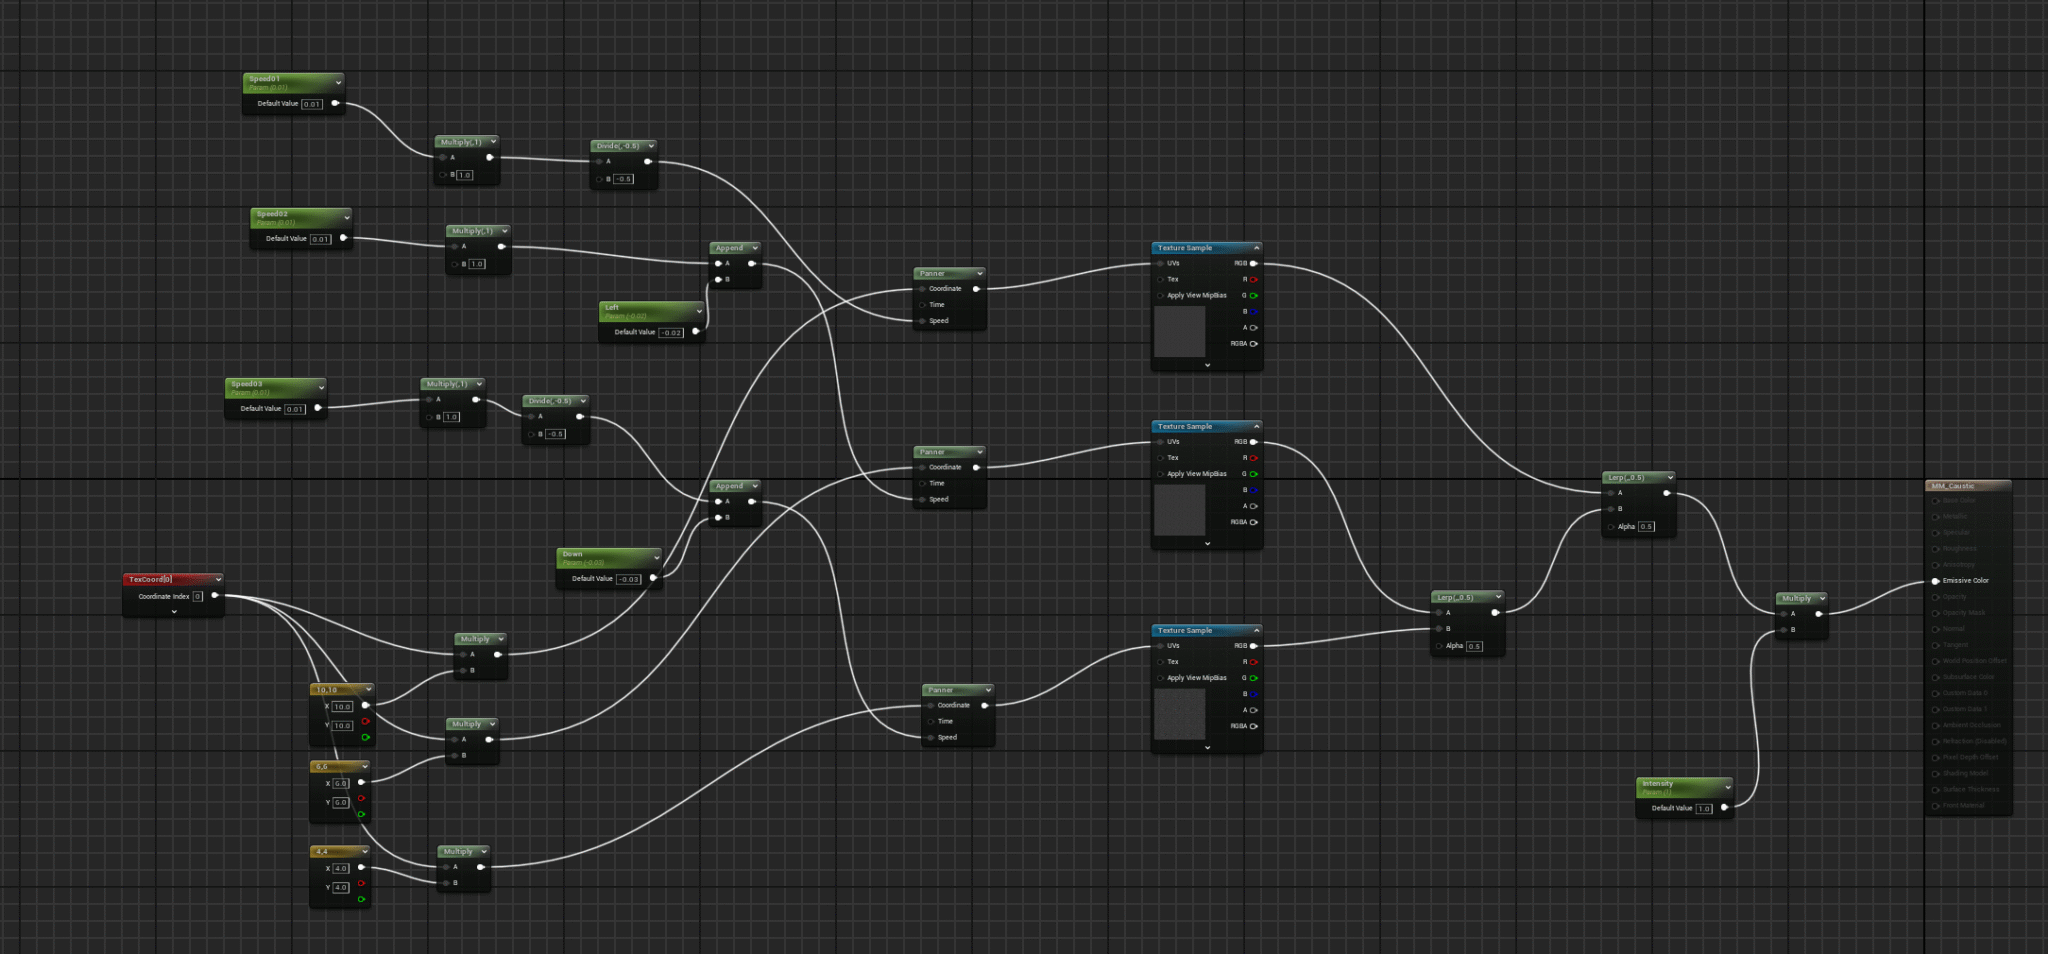
Caustics
To create realistic looking caustics, I generated my own animated caustic in an external program and imported it back into Unreal. Then using 3 instances of the caustics and 3 different panner setups I was able to avoid the caustics repeating themselves and looking low quality. I then used 3 spotlights with the caustic light function applied to create the illusion of the caustics fanning out against the wall as they get higher.
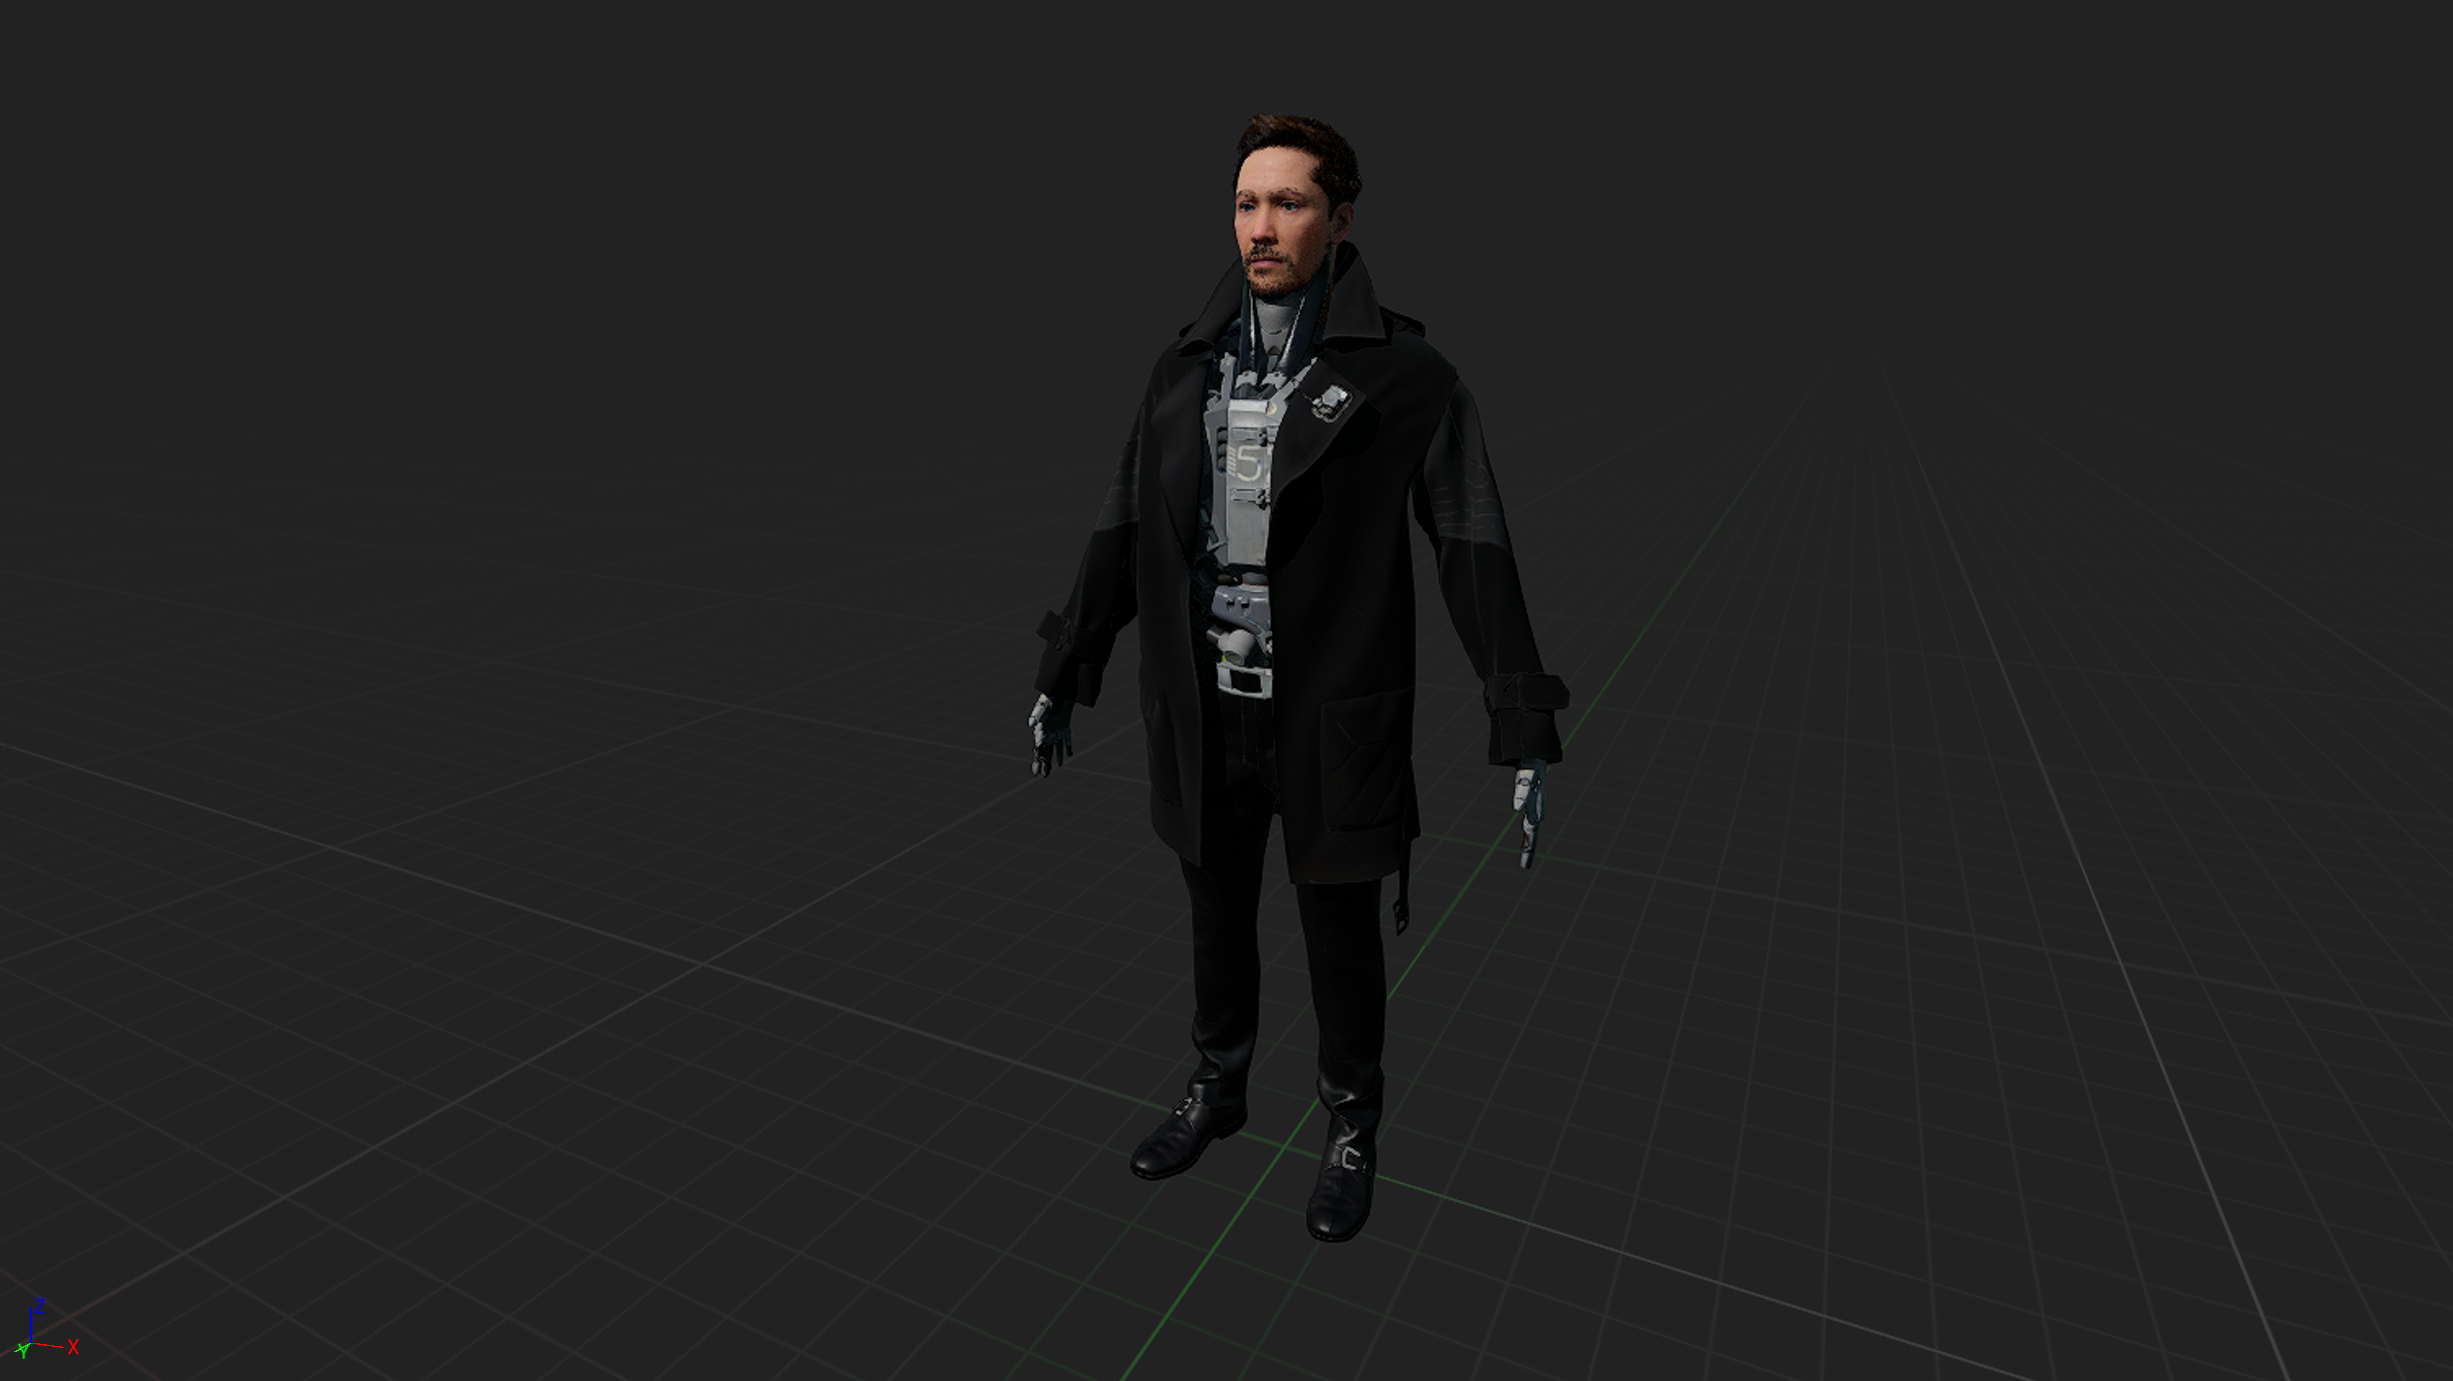
The Character
For the character I sourced a robotic body with an overcoat I thought would fit the themes of the movie. Then I created a Metahuman purely for the head assets which I then separated for use with the body. I put them both together in a blueprint and used the bones from the body rig as parent points to add the head onto. In the head shader I piped an opacity mask into the material so it blended out the neck of the character as by default the neck was very obviously clipping through the rest of the body.
Credit List:
Kitbash3D: Building Assets
Quixel Megascans: Rock assets
Rok Nardin: Music
Akario, KK Design: Environments
RenderLogic: Furniture
Dekogon Studios: Tech Props
Lionsharp: Car
Unfortunately I have since lost my reference list for the project so sadly I cannot give proper credit to the original authors of all elements. I am very sorry.